A plugin that contains a variety of tools to assist in rapid prototyping is the creation cut plugin. This tool allows for using different building blocks for creating models, which then can be used for various product development scenarios.
The Crop-Free plugin can be used to create a crop-free image from a selected image or images on your WordPress site. It adds an action “crop-free” which adds the image to the post directly (you can also add via external editor) with no cropping, and all adjustments are kept in their current state. This will work any version of WordPress from 3.5 to 4.5+.
Creation cut is a plugin for Corel 2020 that makes it easier to cut out objects from your images. It can be used to remove backgrounds, cut out objects from images, and even create your own custom shapes.
Creation cut works by placing a selection around the object you want to remove from an image. Then, you can use the plugin to fill in the background of that selection with any color or image you’d like.
This plugin has many options which allow you to customize how your selections are created, what color they’ll be filled with when they’re done being selected, and how much contrast there will be between the object and its background when you finish making your selection.
Creation cut plugin for corel 2020
Installing the Plugin for CorelDRAW
Supported versions: CorelDRAW X6 or later
Procedure
1. Place the plugin files in the prescribed location.
- Log on as an administrator to the computer that you will connect this machine to.
- If CorelDRAW is running, exit it.
- In the decompressed folder “RSP-094_vxx_GR,” open the folder “CutStudio_CorelDraw_PlugIn_Win_Vxxx” (“xx” represents the version number). This folder contains the following files.
- CutStudioPlugIn.gms (plugin software)
- CutStudioPlugIn.bmp (plugin icon image; for X6 and X7)
- CutStudioPlugIn.ico (plugin icon image; for X8)
- Readme.txt (contains information such as the installation procedure)
- X6 and X7: Copy “CutStudioPlugIn.gms” and “CutStudioPlugIn.bmp” to the following folder. Program Files- Corel- CorelDRAW Graphics Suite ##- Draw- GMS * “##” is “X6” or “X7,” which is the number of the CorelDRAW version that you are using. X8: Copy “CutStudioPlugIn.gms” and “CutStudioPlugIn.ico” to the following folder. Users- User name- AppData- Roaming- Corel CorelDRAW Graphics Suite X8 DRAW- GMS * Open Folder Options (Windows 7)*1 or File Explorer Options (Windows 8.1/10)*2; set Hidden files and folders to Show hidden files, folders, and drives on the View tab; and then click OK. *1 Select Control Panel, Appearance and Personalization, then Folder Options. *2 Select Control Panel, Appearance and Personalization, then File Explorer Options.
- Start CorelDRAW, and then open a new document.
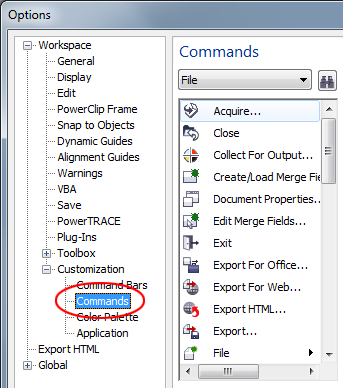
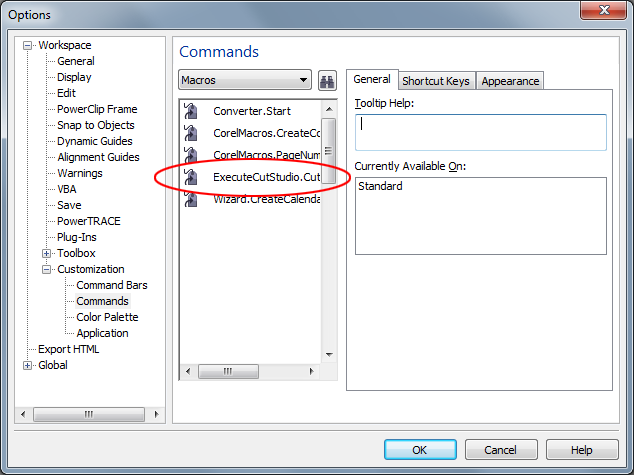
- On the Tools menu, click Customization. The “Options” window appears.
- Click Customization, then Commands.
- Select [Macros] from the pull-down menu.
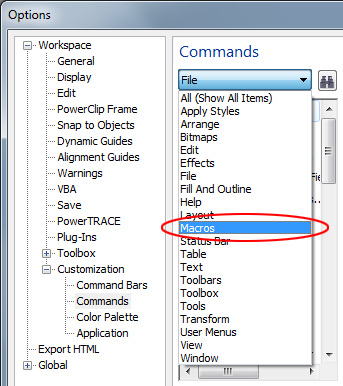 The macro details will appear.
 - Select “ExecuteCutStudio.CutStudio” from the macro list, and then drag this item to the toolbar.
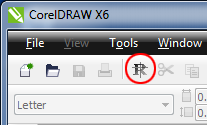
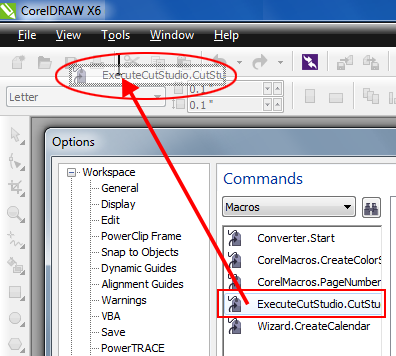 Drag this item to a space where no existing button is present to create a new start button for the plugin. * In this example, we have dragged the item to the right of the “print” button on the standard toolbar to add the new button.
 - Click OK to close the “Options” window.
- Exit CorelDRAW. When you start CorelDRAW again, the added button will appear. (Depending on the version you are using, the button may appear even before you restart the program.)
- Perform step 1 to step 4 in “2. Add the plugin’s start button to the toolbar.” above.
- Select “ExecuteCutStudio.CutStudio” from the macro list.
- Click the [Appearance] tab.
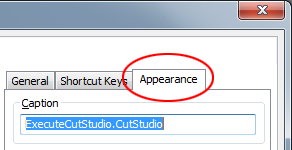 Depending on the version you are using, the name “ExecuteCutStudio.CutStudio” that you selected in the previous step may be displayed under Caption.
 - Click Import.
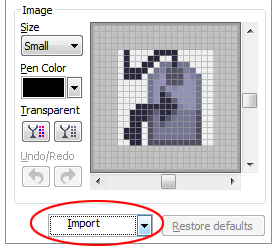
- From the icon list, click Files.
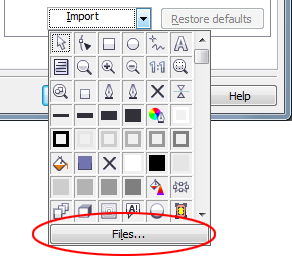
- Select “CutStudioPlugIn.bmp” or “CutStudioPlugIn.ico,” which you moved in step 4 of “1. Place the plugin files in the prescribed location.” above, and then click Open.
- Click OK to close the “Options” window.
 The start button icon changes to the specified icon.